 |
| my very first Ang Ku Kueh made, sans mold |
Once very young, I always look forward to my Mom's question, 'Do you want to go out to the '
Pasar'
* with me?" My eyes would say, 'Yes!' before my voice came out! At this age, I am thinking selfishly that I am my mother's only child. ~
I am in my own world, but I love you no less dearest sisters and I am thankful to have all of you & will never ever trade you for any luxuries in this world. :)
These are times I treasure most, I would create a mental album of images around me. I was only half the height of my own petite beautiful mother. Everything is big. One image among many caught my attention ~ A stall near the bus station with arrays of delicacies, desserts. One particular Chinese dessert. The most beautiful, in my mind ~ Red, delicate with beautiful pattern embossed, oval shaped dessert placed nicely on an oval cut banana leaf. That time, I must feel like I have eyes of a goldfish ~ goggling, snapping, capturing all those beautiful colors. I would just stared quietly, never dare to ask if I can have some, only if my mom offers to.
Years may have passed, it still sticks with me ~ that bright red
kueh* at the stall. Till one day, at school, a friend gave me a bite. What a delicious treat! Where can I have one, more? That was my very first
Ang Ku Kueh. Such delicate skin with not too sweet of a filling, fills my brain with happiness. Oh, so good!
That seems eons ago and recently, craving for one. I cannot get one here and have never made one either. I searched for recipes and found a few. One from
MyKitchenSnippets, caught my most attention. Comparing ingredients with what is available to me here. No mold, I thought. No steamer, I will improvise. No problem. The taste is key and the color of course. Why the color?
Ang is Red in Chinese and
Ku is Turtle. Hence its name, Ang Ku
Kueh. Red Turtle Dessert.
Only after my first time making this, I know now why it is different from most Malay dessert. The filling and the ingredient in its skin. Two key and very healthy ingredient. Mung Bean and Sweet Potatoes. They are fiber loaded.
Ang Ku Kueh Recipe
filling
1 cup of mung bean
2 tbsp canola oil
3/4 cup of sugar
skin
2 cups of glutinous rice flour
1 tbsp sugar
1/2 cup mashed sweet potatoes
1/2 cup hot water
a few drops of red food coloring
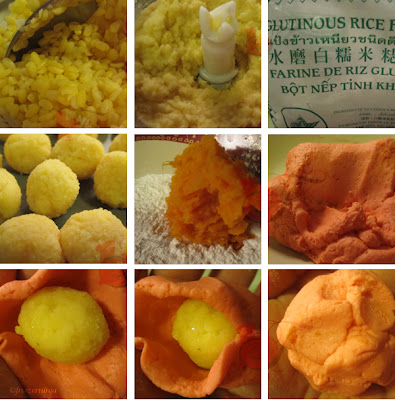 |
| Ingredients with step by step images |
. Soak mung bean overnight and steam till soft.
2. Steam Sweet potatoes till cooked.
3. Add the steamed mung bean while its still warm with canola oil and sugar into a blender. Blend till smooth.
4. In a bowl, mix glutinous rice flour, sugar, mashed sweet potatoes, add in hot water and mix into a dough.
5. Add in a few drops of red food coloring, and knead into the dough.
6. Get the steamer ready, here I am using a wok with a rack and layered with banana leaves.
7. Make the filling into balls.
8. Divide the dough into 16 balls. Flatten dough, put the filling in the center and start pinching, closing the dough to form a ball.
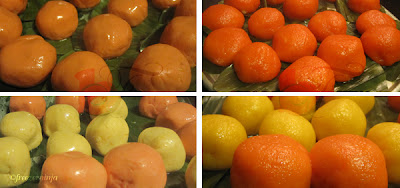 |
| Before & After. Red & Orange Ku. |
. Rubbing a little bit of oil on each, then put them on the banana leaf in the steamer. Steam for 8 minutes.
10. Cool and serve. Yumm.
I made a batch without the red coloring and had the natural sweet potatoes orange color for the skin.
 |
| Chomp! to give you the cross section:) |
 |
| Orange Ku - naturally colored with sweet potatoes as one of the ingredients |
Enjoy!
* Pasar ~ Market;
kueh ~ sweet dessert in Malay
Added March 6th, 2011.
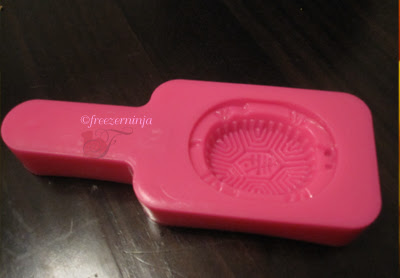 |
| Ang Ku mold . Thanks Julia!:) |
I got this yesterday in my mail from a friend, Julia Lim:) Thanks so much Julia.
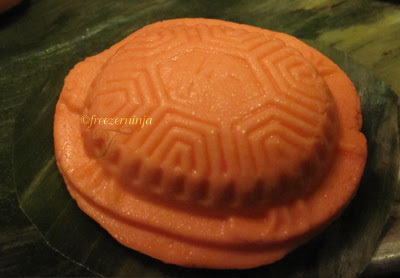 |
| my first trial, a bit too big for the mold. |
 |
| the finish product, Ang Ku Kueh. The way I first saw it |
-------------------------------------------------
From my love for Red Turtle Dessert to my fascination of Red Velvet Cake.
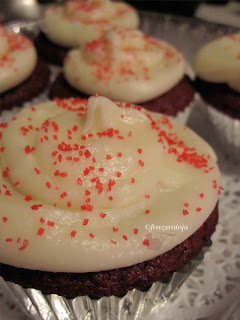 |
| Red Velvet Cupcake |
The famous southern dessert which made me stare at the TV every time a chef makes them. May it be on a throwdown, or a regular food show, I am glued to the screen.
Finally, I had an urge to make it last Christmas for gifts. I found out how easy it is to make this. The recipe search started, comparing each one that I have seen and at last, I found three that I like very much and used this
recipe.
From cupcake to the ice cream cone. I am on a Red Velvet cupcake baking mode!:) I made a regular cupcake and the other putting them in an ice cream cone. Kudos to those who came up with this brilliant idea:) perfect for a little kid's party cake.
 |
| Red Velvet process |
These are images from my trials in my magic kitchen. My therapeutic space.
 |
| Red Velvet in Ice Cream Cone |
I hope you will try and enjoy them as much as I did. Click this
recipe. Happy Baking!:)


